

Most people don’t fail at writing a book—they fail at starting it the right way. According to recent publishing industry data, over 80% of people want to write a book, yet fewer than 3% ever complete one. The difference isn’t talent, time, or even great ideas. It’s having a clear, proven system that transforms overwhelming dreams into manageable daily actions. The best way to write a book follows a structured approach that anyone can master, regardless of writing experience.
Writing a book feels overwhelming because most people approach it backward. They wait for inspiration, dive into writing without direction, or expect perfection from their first attempt. This guide reveals the exact process successful authors use to go from blank page to published book—a method that prioritizes progress over perfection and consistency over motivation.
Whether you’re dreaming of writing fiction, sharing your expertise through non-fiction, or telling your personal story, this comprehensive roadmap will show you the most effective path forward. No complicated theories or artistic mystique—just practical steps that work.
Key Takeaways
• Start with clarity, not creativity – Define your book’s purpose and target reader before writing a single word
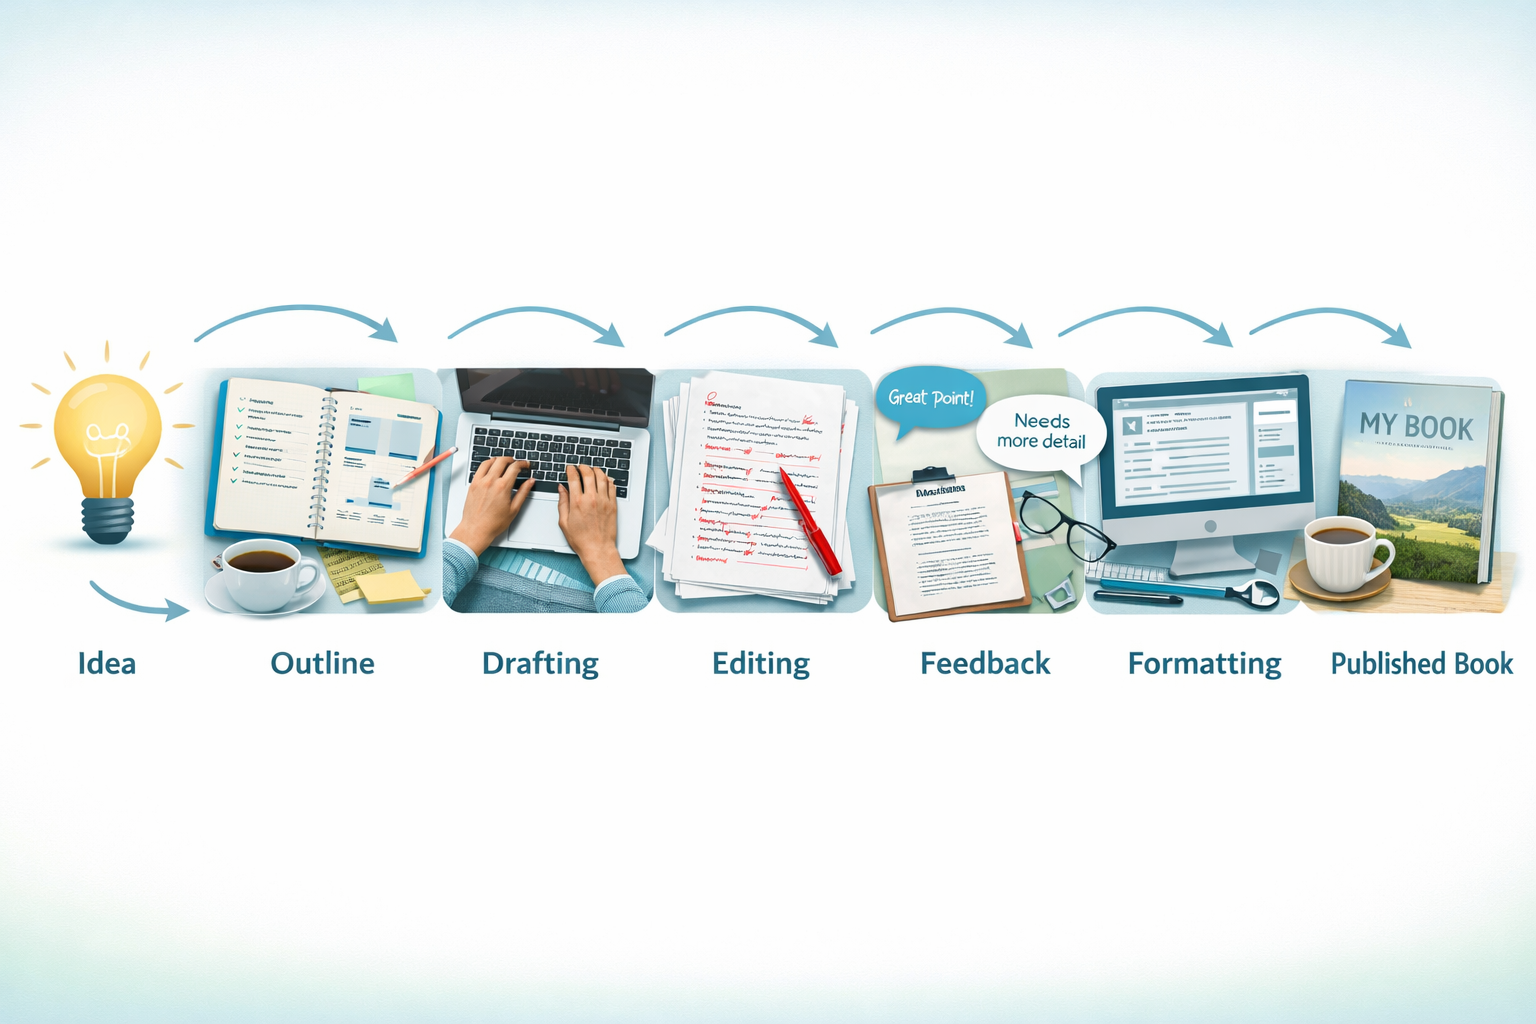
• Follow the proven 7-step process – Idea → Outline → Draft → Edit → Feedback → Format → Publish
• Consistency beats perfection – Daily writing habits of 30-60 minutes produce better results than waiting for inspiration
• Embrace the messy first draft – The real book emerges during editing, not initial writing
• Publishing is easier than ever – Self-publishing platforms make it possible to share your work without traditional gatekeepers
What Is the Best Way to Write a Book? (Quick Answer)
The best way to write a book starts with clarity, not perfection. Too many aspiring authors get stuck because they try to write and edit simultaneously, or they begin without a clear direction. The most effective approach follows a structured, step-by-step process that separates each phase of book creation.
Here’s the proven framework that works:
- Choose a focused idea 📝
- Create a simple outline 🗂️
- Write the first draft ✍️
- Edit and improve ✏️
- Get feedback 👥
- Format your manuscript 📄
- Publish your book 📚
This system works because it breaks an overwhelming project into manageable chunks. Each step has a specific purpose and builds on the previous one. Most importantly, it emphasizes consistency over motivation—you don’t need to feel inspired every day, you just need to show up and follow the process.
The key insight? Writing a book isn’t about having perfect prose from day one. It’s about getting your ideas down on paper first, then shaping them into something powerful through revision. Professional authors understand this distinction, which is why they can complete books while others struggle to finish a single chapter.
Before diving into each step, it’s worth noting that discovering the kind of writer you want to be can help clarify your approach and goals from the start.
Step 1: Choose a Clear, Focused Book Idea
Vague ideas lead to unfinished books. The most common mistake new writers make is starting with a concept that’s too broad or unclear. “I want to write about my life” or “I have a story about love” aren’t focused enough to sustain a full book. You need laser-sharp clarity on what your book is about and who it’s for.
How to Identify Your Message or Story
Start by completing this sentence: “My book helps [specific type of person] to [achieve specific outcome] by [your unique approach].” For example:
- “My book helps new entrepreneurs overcome self-doubt by sharing practical strategies I learned building three successful businesses.”
- “My book helps parents of anxious children understand their child’s needs through relatable stories and expert-backed techniques.”
For fiction writers, try: “My story follows [specific character] who must [overcome specific challenge] to [achieve specific goal].”
Define Your Target Reader
Picture one specific person who would benefit from your book. Give them a name, age, and specific challenges. This isn’t about limiting your audience—it’s about creating focus that makes your writing more powerful and relatable.
Quick Exercise: What Problem Does Your Book Solve?
Write down three specific problems your ideal reader faces. Your book should address at least one of these directly. If you can’t identify clear problems, your idea may need more development.
For non-fiction, consider what expertise or experience you have that others could benefit from. For fiction, think about what emotional journey or entertainment value you want to provide.
Remember, the best books often come from personal experience combined with a desire to help others avoid similar struggles or achieve similar successes.
Step 2: Create a Simple Outline Before Writing
Outlining saves time and reduces overwhelm. Many writers resist outlining because they think it stifles creativity, but the opposite is true. A good outline provides structure that actually frees you to be more creative within each section. It’s like having a roadmap—you know where you’re going, so you can enjoy the journey.
Types of Outlines That Work
Chapter-by-Chapter Approach:
- List 8-12 main topics (for most books)
- Write 2-3 sentences describing what each chapter covers
- Arrange chapters in logical order
Bullet-Point Structure:
- Main point 1
- Supporting detail A
- Supporting detail B
- Example or story
- Main point 2
- Supporting detail A
- Supporting detail B
For fiction, try the three-act structure:
- Act 1: Setup (25% of book) – Introduce character, world, conflict
- Act 2: Confrontation (50% of book) – Develop conflict, complications
- Act 3: Resolution (25% of book) – Climax and conclusion
Start Messy—Refine Later
Your first outline doesn’t need to be perfect. In fact, it shouldn’t be. Start by brain-dumping all your ideas, then organize them into a logical flow. Many successful authors create what they call a “vomit draft” outline—getting everything out first, then cleaning it up.
Pro tip: Use index cards or sticky notes (physical or digital) to arrange your ideas. This makes it easy to move sections around until you find the best structure.
The goal isn’t to lock yourself into a rigid plan, but to have enough structure that you never sit down to write wondering “What should I write about today?” When you have a clear outline, writing becomes much easier because you’re executing a plan rather than creating from scratch each time.
If you’re still determining the best place to write a book, having your outline ready will help you make the most of whatever writing environment you choose.
Step 3: Write the First Draft Without Stopping
The biggest mistake new writers make is editing while writing. This kills momentum and turns a creative process into a critical one. Your first draft has one job: to exist. It doesn’t need to be good, clever, or polished. It just needs to be complete.
Set Daily Word Count Goals
Consistency trumps intensity every time. Writing 300 words daily for 100 days produces a 30,000-word book—enough for most non-fiction books or a short novel. Here are realistic daily targets:
| Goal Level | Daily Words | Time Needed | Book Length in 3 Months |
|---|---|---|---|
| Beginner | 200-300 | 30-45 minutes | 18,000-27,000 words |
| Intermediate | 500-750 | 45-60 minutes | 45,000-67,500 words |
| Advanced | 1,000+ | 60-90 minutes | 90,000+ words |
Use Time Blocks Effectively
The 30-60 minute sweet spot: Most people can maintain focus for 30-60 minutes without burning out. Set a timer, eliminate distractions, and write until it goes off. No checking email, social media, or “quick research” during this time.
Morning writing works best for most people because willpower is strongest early in the day. But find what works for your schedule and stick to it consistently.
Mindset Shift: Progress Over Perfection
Remember these mantras during your first draft:
- ✅ “Done is better than perfect”
- ✅ “I can fix bad writing, but I can’t fix no writing”
- ✅ “The real book emerges in editing”
Handle your inner critic: When you catch yourself wanting to edit, write “[FIX LATER]” and keep going. This acknowledges the issue without derailing your momentum.
Stuck on a scene or section? Write “[SOMETHING HAPPENS HERE]” and move to the next part. You can always come back and fill in gaps during editing.
The key is building the habit of showing up consistently. Some days you’ll write brilliantly, others you’ll struggle to hit your word count. Both are normal and necessary parts of the process.
For additional motivation and techniques, check out these strategies for overcoming writer’s block when you hit inevitable rough patches.
Step 4: Edit and Improve Your Manuscript
Editing is where the real book is made. Your first draft gave you raw material; editing transforms that material into something readers will love. This phase separates amateur writers from professionals, and it’s where most of the actual “writing” happens.
Focus Areas for Effective Editing
1. Clarity First
- Can readers easily understand your main points?
- Are your sentences clear and direct?
- Do you explain concepts in logical order?
2. Flow and Structure
- Does each chapter build on the previous one?
- Are transitions smooth between sections?
- Does the overall arc make sense?
3. Simplicity Wins
- Cut unnecessary words and phrases
- Replace complex words with simple ones
- Eliminate redundant information
Tools and Strategies That Work
The Three-Pass Method:
- Pass 1: Big picture – Does the overall structure work?
- Pass 2: Chapter level – Does each section serve its purpose?
- Pass 3: Line editing – Fix grammar, word choice, flow
Self-Editing Checklist:
- Remove filler words (very, really, quite, just)
- Cut weak verbs (is, was, were, had)
- Eliminate redundant phrases
- Check for consistent tone
- Verify facts and examples
Reading Aloud Strategy
Read your manuscript out loud or use text-to-speech software. Your ears catch problems your eyes miss:
- Awkward phrasing
- Run-on sentences
- Missing words
- Unnatural dialogue
Digital Editing Tools:
- Grammarly: Catches grammar and style issues
- Hemingway Editor: Highlights complex sentences
- ProWritingAid: Comprehensive writing analysis
The 10% Rule
Professional editors often cut 10-20% of a first draft. This isn’t failure—it’s refinement. Every sentence should either advance your story or support your main message. If it doesn’t, cut it.
Before and After Example:
- Before: “It’s really quite important to understand that the very best way to achieve success in this particular area is to focus your attention on the specific strategies that have been proven to work effectively.”
- After: “Success requires focusing on proven strategies.”
Remember, editing is rewriting. Don’t be afraid to reorganize entire sections, cut beloved paragraphs that don’t serve the book, or add new material that strengthens your message.
Step 5: Get Feedback Before Publishing
Outside perspective reveals blind spots you can’t see. After spending weeks or months with your manuscript, you’re too close to judge it objectively. Fresh eyes catch confusing sections, identify missing information, and highlight your strongest material.
Who to Ask for Feedback
Beta Readers (Best Option)
These are people from your target audience who read your book before publication. They provide reader perspective rather than technical editing.
Ideal beta readers:
- Represent your target audience
- Read books in your genre
- Can provide honest, constructive feedback
- Understand they’re reading a draft
Friends and Family (Use Carefully)
While well-meaning, friends and family often give overly positive feedback or focus on the wrong elements. If you ask them, be specific about what feedback you need.
Writing Groups or Online Communities
Many writers find valuable feedback through:
- Local writing groups
- Online writing forums
- Social media writing communities
- Writing workshops
What Kind of Feedback to Look For
Big Picture Questions:
- Was the main message/story clear?
- Which parts were most engaging?
- Where did you lose interest or get confused?
- What questions were left unanswered?
Specific Feedback Areas:
- Pacing: Did any sections feel too slow or rushed?
- Clarity: Were any concepts hard to understand?
- Examples: Which stories/examples were most helpful?
- Tone: How did the writing make you feel?
Questions to Ask Beta Readers:
- What’s the main takeaway from this book?
- Who would you recommend this book to?
- What’s one thing you’d change?
- What’s the strongest section?
How to Handle Feedback
Look for patterns: If multiple readers mention the same issue, it’s probably worth addressing. One person’s opinion might be subjective, but three people pointing out the same problem indicates a real issue.
Consider the source: Weight feedback based on how well the reader represents your target audience. A romance reader’s feedback on your business book may not be as relevant.
You don’t have to implement everything: Feedback is data, not commands. Use your judgment about which suggestions align with your vision and goals.
Getting quality feedback can significantly improve your book’s impact and reader satisfaction. It’s one of the most valuable steps in the publishing process, yet many authors skip it in their eagerness to publish.
Step 6: Format and Prepare Your Book
Proper formatting makes your book look professional and readable. Poor formatting screams “amateur” and distracts readers from your content. Fortunately, basic book formatting isn’t complicated—you just need to know the essential elements.
Basic Formatting Essentials
Chapter Structure:
- Start each chapter on a new page
- Use consistent heading styles (bold, larger font)
- Include chapter numbers and titles
- Add extra space before first paragraph
Typography Basics:
- Font: Times New Roman, Garamond, or similar readable serif font
- Size: 11-12 point for body text
- Line spacing: 1.5 or double-spaced for print books
- Margins: At least 1 inch on all sides
Page Elements:
- Page numbers (usually bottom center or outside corners)
- Headers with book title or chapter name
- Proper paragraph indentation (0.3-0.5 inches)
Tools for Formatting
Microsoft Word or Google Docs
Most authors can format their books using standard word processors. Both offer:
- Style templates
- Automatic page numbering
- Table of contents generation
- Export to PDF
Free Formatting Tools:
- Reedsy Design Editor: Free online book formatter
- Book Brush: Simple formatting for various platforms
- Canva: Book cover and interior design templates
Professional Options:
- Vellum: Mac-only, creates beautiful ebooks and print books
- Atticus: Cross-platform writing and formatting tool
- InDesign: Professional publishing software (steeper learning curve)
Preparing for Different Formats
Print Books:
- Higher resolution images (300 DPI)
- Wider margins for binding
- Consider page count for printing costs
Ebooks:
- Simpler formatting works better
- Avoid complex layouts
- Test on multiple devices
Audiobooks:
- Clean, well-formatted script
- Clear chapter breaks
- Pronunciation notes for difficult words
For authors planning to self-publish, understanding the importance of proper book formatting can make the difference between a book that looks amateur and one that competes with traditionally published titles.
The goal is creating a reading experience that feels seamless and professional, allowing readers to focus entirely on your content rather than being distracted by formatting issues.
Step 7: Publish Your Book
Publishing your book has never been easier or more accessible. In 2026, authors have multiple paths to reach readers, each with distinct advantages. The best way to write a book includes understanding your publishing options so you can choose the approach that aligns with your goals and timeline.
Publishing Options Overview
Self-Publishing (Fastest Route)
- Complete creative control
- Higher royalty rates (35-70%)
- Faster time to market (days to weeks)
- You handle all marketing and promotion
- Keep all rights to your work
Traditional Publishing
- Publisher handles production and distribution
- Professional editing and marketing support
- Lower royalty rates (8-15%)
- Longer timeline (1-3 years)
- Need literary agent for most publishers
Why Self-Publishing Often Works Best for New Authors
Self-publishing offers several advantages for first-time authors:
✅ Speed: Your book can be available within days of completion
✅ Learning: You gain experience with the entire publishing process
✅ Control: You make all decisions about content, cover, pricing
✅ Profit: Higher per-book earnings
✅ Flexibility: Easy to update or revise your book
For many authors, self-publishing provides compelling benefits that outweigh the additional responsibilities.
Top Self-Publishing Platforms
Amazon Kindle Direct Publishing (KDP)
- Largest ebook marketplace
- Print-on-demand paperbacks
- Global distribution
- Free to publish
Other Platforms to Consider:
- Apple Books: Good for reaching iOS users
- Barnes & Noble Press: Access to physical bookstore placement
- Kobo: Strong international presence
- Draft2Digital: Distributes to multiple platforms simultaneously
Essential Publishing Steps
- Create a compelling book cover (hire a designer or use templates)
- Write an engaging book description (think marketing copy, not summary)
- Choose relevant categories and keywords for discoverability
- Set competitive pricing (research similar books)
- Plan your launch strategy (more on this below)
Pricing Guidelines:
- Ebooks: $2.99-$9.99 (sweet spot: $4.99-$6.99)
- Paperbacks: $8.99-$19.99 depending on length and genre
- Consider introductory pricing to build initial reviews
The key is starting with one platform (usually Amazon due to its reach) and expanding to others once you’ve learned the basics. Remember, publishing is just the beginning—successful authors treat book marketing as an ongoing process, not a one-time event.
Tips That Make Writing a Book Easier
Small changes in approach can dramatically improve your writing experience. These practical strategies help you maintain momentum, overcome common obstacles, and actually enjoy the process of creating your book.
Write at the Same Time Daily
Consistency creates momentum. Your brain adapts to regular writing schedules, making it easier to slip into creative flow. Whether it’s 6 AM with coffee or 9 PM after dinner, pick a time and protect it fiercely.
Benefits of routine writing:
- Eliminates decision fatigue about when to write
- Builds automatic habits that require less willpower
- Trains your subconscious to prepare ideas during non-writing hours
- Creates accountability through established patterns
Lower Your Expectations Early
Perfect is the enemy of done. Many writers never finish because they expect their first book to be a masterpiece. Professional authors know that writing skills develop through practice, not perfection-seeking.
Helpful mindset shifts:
- “This is practice, not my magnum opus”
- “I’m learning the process of completing a book”
- “My second book will be better than my first”
- “Done and imperfect beats perfect and never finished”
Break the Process Into Small Steps
Overwhelming projects become manageable when broken down. Instead of “write a book,” focus on “write 300 words today” or “complete chapter 3 this week.”
Daily micro-goals that work:
- Write one page
- Complete one section
- Edit one chapter
- Research one topic
- Write for 25 minutes (Pomodoro technique)
Use Tools to Speed Things Up
Technology can accelerate every phase of book writing:
Writing Tools:
- Scrivener: Organize research, notes, and manuscript in one place
- Google Docs: Cloud-based writing with automatic saving
- Focus apps: Block distracting websites during writing time
Research and Ideas:
- Voice recording apps: Capture ideas while driving or walking
- Note-taking apps: Organize research and inspiration
- AI writing assistants: Help with brainstorming and overcoming blocks
Productivity Techniques:
- Time blocking: Dedicate specific hours to writing
- Batch processing: Do similar tasks together (all editing, all research)
- Environment design: Create a dedicated writing space
Track Your Progress
Visible progress motivates continued effort. Keep a simple log of:
- Daily word count
- Chapters completed
- Hours spent writing
- Milestones reached
Celebration matters: Acknowledge completing chapters, hitting word count goals, or finishing your first draft. These small victories fuel motivation for the long journey ahead.
The goal isn’t to make writing effortless—it’s to remove unnecessary friction so you can focus your energy on the creative work that matters.
Common Mistakes to Avoid
Learning from others’ mistakes saves time and frustration. These four pitfalls derail more aspiring authors than any other obstacles. Recognizing them early helps you navigate around common traps.
Waiting for Inspiration
Inspiration is unreliable; systems are dependable. Professional writers don’t wait for the muse—they show up consistently whether they feel like it or not. Inspiration often follows action rather than preceding it.
Instead of waiting:
- Set a regular writing schedule
- Start with small, achievable goals
- Write even when you don’t feel like it
- Trust that momentum builds motivation
Skipping the Outline
“I’ll figure it out as I go” leads to abandoned manuscripts. Without direction, writers often hit walls around chapter 3-5 and lose momentum. Even a simple outline provides enough structure to maintain forward progress.
Why outlines matter:
- Prevent writer’s block (you always know what comes next)
- Maintain focus on your main message
- Help identify structural problems early
- Make editing much easier
Trying to Write Perfectly the First Time
First drafts are meant to be messy. Attempting to craft perfect prose while creating kills creativity and slows progress to a crawl. The editing phase exists specifically to refine and improve your initial ideas.
Remember:
- Writing and editing use different parts of your brain
- Professional authors expect multiple drafts
- Bad first drafts often become excellent finished books
- You can’t edit a blank page
Giving Up Too Early
Most people quit right before they would have succeeded. Writing a book is a marathon, not a sprint. Expect difficult days, periods of doubt, and moments when your writing feels terrible.
Common quit points:
- Around 10,000 words (initial excitement wears off)
- Middle of the book (the “muddy middle”)
- After receiving criticism or feedback
- When comparing your draft to published books
Push through by:
- Remembering why you started
- Focusing on daily progress, not perfection
- Connecting with other writers for support
- Celebrating small wins along the way
The 80/20 rule applies: 80% of people who start books never finish them. Simply completing a manuscript puts you in the top 20% of aspiring authors, regardless of quality.
Understanding these common pitfalls helps you prepare mentally for the challenges ahead. Every successful author has faced these same obstacles—the difference is they found ways to work through them rather than letting them stop their progress.
How Long Does It Take to Write a Book?
Realistic timelines depend on consistency, not talent. The question isn’t whether you can write a book quickly, but whether you can maintain steady progress over time. Understanding typical timelines helps set appropriate expectations and plan your writing schedule.
Realistic Timelines by Book Type
Short Non-Fiction Books (20,000-30,000 words):
- Daily writing: 300 words = 10-15 weeks
- Weekend warrior: 1,000 words/weekend = 6-8 months
- Intensive approach: 1,000 words daily = 4-6 weeks
Full-Length Books (60,000-80,000 words):
- Consistent daily writing: 500 words = 4-6 months
- Part-time schedule: 300 words daily = 6-9 months
- Aggressive timeline: 1,500 words daily = 6-8 weeks
Including editing and revision: Add 2-4 weeks for self-editing and another 2-3 weeks for incorporating feedback and final polishing.
Factors That Affect Timeline
Writing Speed Variables:
- Experience level: First-time authors typically write slower
- Genre complexity: Fiction often takes longer than straightforward non-fiction
- Research requirements: Heavy research adds significant time
- Available writing time: Consistency matters more than total hours
Real-World Timeline Examples:
- Stephen King: Aims for 2,000 words daily, completes novels in 3-4 months
- First-time authors: Often take 6-12 months for their first book
- Part-time writers: Typically need 8-18 months depending on consistency
The Consistency Factor
Daily writing beats weekend marathons. Writing 200 words every day produces better results than writing 1,400 words once per week, even though the weekly total is the same.
Why daily writing works better:
- Maintains story/content momentum
- Keeps characters and concepts fresh in your mind
- Builds sustainable habits
- Reduces the mental effort of “getting back into” your book
Minimum effective dose: Even 15-20 minutes daily can produce meaningful progress. Many successful authors started with just 15 minutes before work or during lunch breaks.
Setting Your Personal Timeline
Calculate your realistic pace:
- Determine how many words you can comfortably write in 30 minutes
- Multiply by how many days per week you can write
- Divide your target book length by weekly word count
- Add 25% buffer time for life interruptions
Example calculation:
- 250 words per 30-minute session
- 5 days per week = 1,250 words weekly
- 50,000-word book ÷ 1,250 = 40 weeks
- Plus 25% buffer = 50 weeks (about 1 year)
Remember: These are estimates, not deadlines. The goal is finishing your book, not meeting an arbitrary timeline. Some weeks you’ll exceed your targets, others you’ll fall short. What matters is maintaining forward momentum over time.
The most important timeline insight? Starting today matters more than finishing quickly. A book completed in 18 months beats a book never started because the timeline felt too long.
The Best Way to Write a Book: Your Action Plan
Writing a book is a learnable process, not a mysterious art. The best way to write a book follows the systematic approach outlined in this guide: start with a clear idea, create structure through outlining, write consistently without editing, then refine through revision and feedback.
Your Next Steps (Start Today)
Week 1: Foundation
- Define your book’s core message using the formula provided
- Identify your target reader specifically
- Choose your writing schedule and time
- Set up your writing environment
Week 2-3: Structure
- Create your chapter outline
- Break each chapter into 3-5 main points
- Gather any research or examples needed
- Set your daily word count goal
Month 1-3: Writing
- Write your first draft without editing
- Track daily progress
- Push through difficult sections
- Celebrate milestone completions
Month 4: Refinement
- Complete your first edit focusing on big picture issues
- Do a second pass for clarity and flow
- Find beta readers for feedback
- Incorporate valuable suggestions
Month 5: Publishing
- Format your manuscript
- Design or commission a cover
- Choose your publishing platform
- Launch your book
Remember the Core Principles
The best way to write a book prioritizes:
✅ Progress over perfection – Done beats perfect every time
✅ Consistency over intensity – Daily habits trump weekend marathons
✅ Structure over inspiration – Systems work when motivation fails
✅ Completion over comparison – Your finished book beats anyone’s perfect idea
Why This Approach Works
This method succeeds because it treats book writing as a project with defined phases rather than a creative mystery. By separating ideation, writing, editing, and publishing into distinct steps, you can focus fully on each phase without the overwhelm of trying to do everything simultaneously.
Thousands of first-time authors have used variations of this process to complete their books. The specific techniques matter less than following a consistent system that moves you steadily from idea to published book.
Your Writing Journey Starts Now
The best time to start writing your book was yesterday. The second-best time is today. You now have a proven roadmap that transforms the overwhelming goal of “writing a book” into manageable daily actions.
Don’t wait for perfect conditions, complete clarity, or unlimited time. Start with what you have, where you are, using the tools available to you. Your first book teaches you how to write your second book, which teaches you how to write your third.
Take action today: Open a document, write your book’s working title, and complete the first exercise from Step 1. Your future self—and your future readers—will thank you for starting today rather than waiting for tomorrow.
The world needs the book only you can write. Now you know exactly how to write it.
For additional support on your writing journey, explore resources on developing your writing skills and planning your book launch to maximize your book’s impact once it’s complete.


